# Building Llama iOS Demo for MPS Backend
This tutorial covers the end to end workflow for building an iOS demo app using MPS backend on device.
More specifically, it covers:
1. Export and quantization of Llama models against the MPS backend.
2. Building and linking libraries that are required to inference on-device for iOS platform using MPS.
3. Building the iOS demo app itself.
## Prerequisites
* [Xcode 15](https://developer.apple.com/xcode)
* [iOS 18 SDK](https://developer.apple.com/ios)
* Set up your ExecuTorch repo and environment if you haven’t done so by following the [Setting up ExecuTorch](https://pytorch.org/executorch/stable/getting-started-setup) to set up the repo and dev environment:
## Setup ExecuTorch
In this section, we will need to set up the ExecuTorch repo first with Conda environment management. Make sure you have Conda available in your system (or follow the instructions to install it [here](https://conda.io/projects/conda/en/latest/user-guide/install/index.html)). The commands below are running on Linux (CentOS).
Create a Conda environment
```
conda create -n et_mps python=3.10.0
conda activate et_mps
```
Checkout ExecuTorch repo and sync submodules
```
git clone https://github.com/pytorch/executorch.git
cd executorch
git submodule sync
git submodule update --init
```
Install dependencies
```
./install_requirements.sh
```
## Prepare Models
In this demo app, we support text-only inference with Llama 3.1, Llama 3, and Llama 2 models.
Install the required packages to export the model
```
sh examples/models/llama/install_requirements.sh
```
Export the model
```
python -m examples.models.llama.export_llama --checkpoint "${MODEL_DIR}/consolidated.00.pth" --params "${MODEL_DIR}/params.json" -kv --use_sdpa_with_kv_cache --mps -d fp32 --disable_dynamic_shape -qmode 8da4w -G 32
```
## Pushing Model and Tokenizer
### Copy the model to Simulator
* Drag&drop the model and tokenizer files onto the Simulator window and save them somewhere inside the iLLaMA folder.
* Pick the files in the app dialog, type a prompt and click the arrow-up button.
### Copy the model to Device
* Wire-connect the device and open the contents in Finder.
* Navigate to the Files tab and drag & drop the model and tokenizer files onto the iLLaMA folder.
* Wait until the files are copied.
## Configure the XCode Project
### Install CMake
Download and open the macOS .dmg installer at https://cmake.org/download and move the Cmake app to /Applications folder.
Install Cmake command line tools:
```
sudo /Applications/CMake.app/Contents/bin/cmake-gui --install
```
### Swift Package Manager
The prebuilt ExecuTorch runtime, backend, and kernels are available as a Swift PM package.
### Xcode
Open the project in Xcode.In Xcode, go to `File > Add Package Dependencies`. Paste the URL of the ExecuTorch repo into the search bar and select it. Make sure to change the branch name to the desired ExecuTorch version, e.g., “0.4.0”, or just use the “latest” branch name for the latest stable build.
Note: If you're running into any issues related to package dependencies, quit Xcode entirely, delete the whole executorch repo, clean the caches by running the command below in terminal and clone the repo again.
```
rm -rf \
~/Library/org.swift.swiftpm \
~/Library/Caches/org.swift.swiftpm \
~/Library/Caches/com.apple.dt.Xcode \
~/Library/Developer/Xcode/DerivedData
```
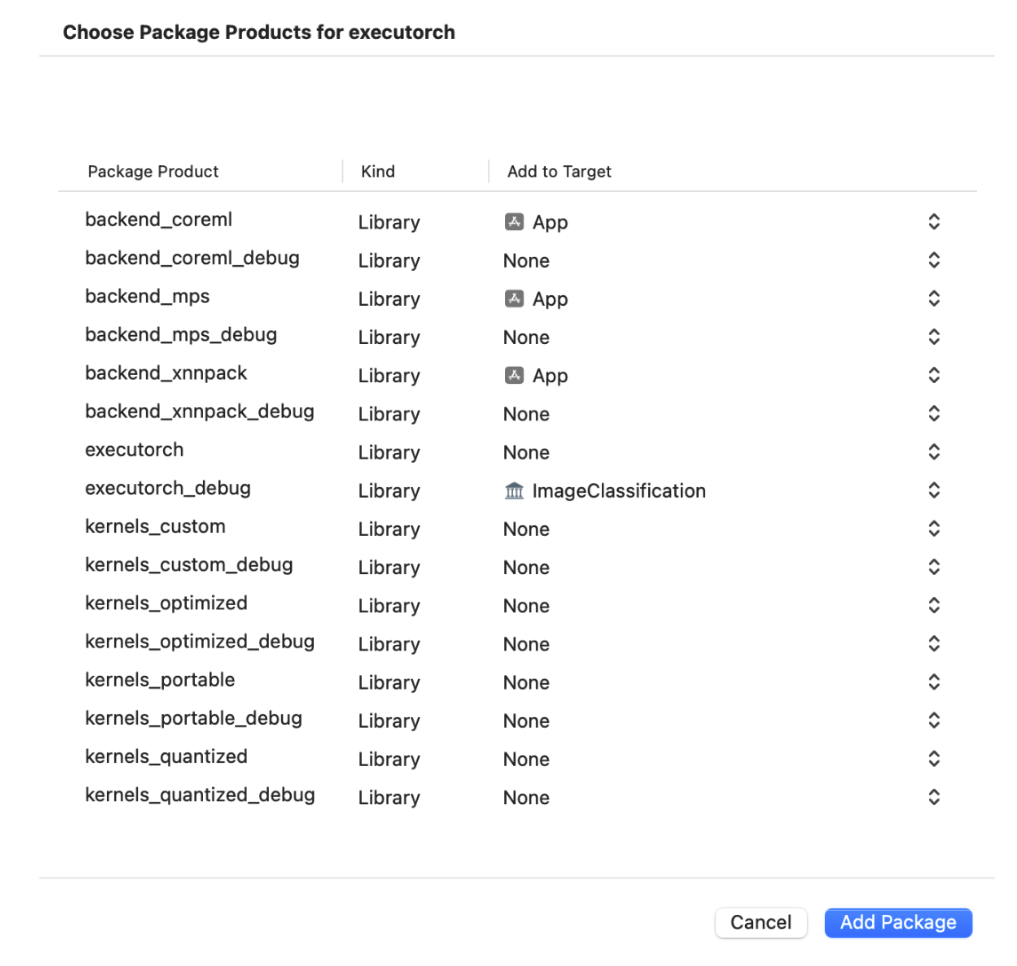
Link your binary with the ExecuTorch runtime and any backends or kernels used by the exported ML model. It is recommended to link the core runtime to the components that use ExecuTorch directly, and link kernels and backends against the main app target.
Note: To access logs, link against the Debug build of the ExecuTorch runtime, i.e., the executorch_debug framework. For optimal performance, always link against the Release version of the deliverables (those without the _debug suffix), which have all logging overhead removed.
For more details integrating and Running ExecuTorch on Apple Platforms, checkout this [link](https://pytorch.org/executorch/main/apple-runtime.html).

Then select which ExecuTorch framework should link against which target.
Click “Run” to build the app and run in on your iPhone. If the app successfully run on your device, you should see something like below:

## Reporting Issues
If you encountered any bugs or issues following this tutorial please file a bug/issue here on [Github](https://github.com/pytorch/executorch/issues/new).